Do you often take Polaroid pictures but find that they come out too dark or dull? Don’t worry, there are several steps you can take to make your photos brighter and more vibrant. First, it’s important to understand the factors that affect Polaroid picture brightness.
Factors Influencing Polaroid Picture Brightness
Capturing the perfect Polaroid picture involves more than just clicking the shutter button. Various elements come into play, shaping the brightness of your instant snapshots. The luminosity of a Polaroid picture is intricately linked to multiple factors, such as the ambient light available during the moment of capture, the settings configured on your camera, and the specific type of Polaroid film employed.
Moreover, the condition and storage environment of the film itself contributes significantly to the resultant brightness of your cherished memories.
Comprehending the interplay of these factors is crucial to elevate the quality of their images. Acquiring knowledge about these influential aspects empowers photographers to capture superior pictures, ultimately immortalizing moments in vibrant and enduring Polaroid snapshots.
The Art of Polaroid Picture Brightness
Capturing the perfect Polaroid picture is an art that requires a delicate balance of various factors. Understanding how these factors influence the brightness of your pictures can help you master the art of creating captivating Polaroid images. Let’s dive into the key elements that shape the luminosity of your Polaroid snapshots.
Below are the factors affecting Polaroid picture brightness
Dance of Light: The Crucial Role of Illumination
- Insufficient Light: Inadequate light during capture can lead to dark and grainy pictures. Ample light is necessary for the camera to expose the film properly and produce a clear image;
- Excessive Light: Overexposure can cause your pictures to appear washed out, losing intricate details. Striking the right balance between light and subject is essential for well-exposed Polaroid photographs.
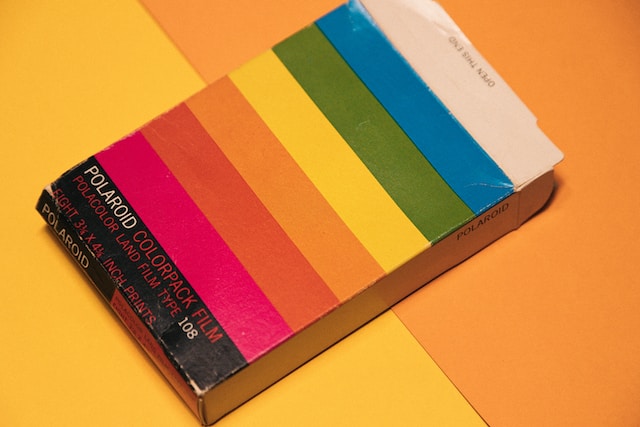
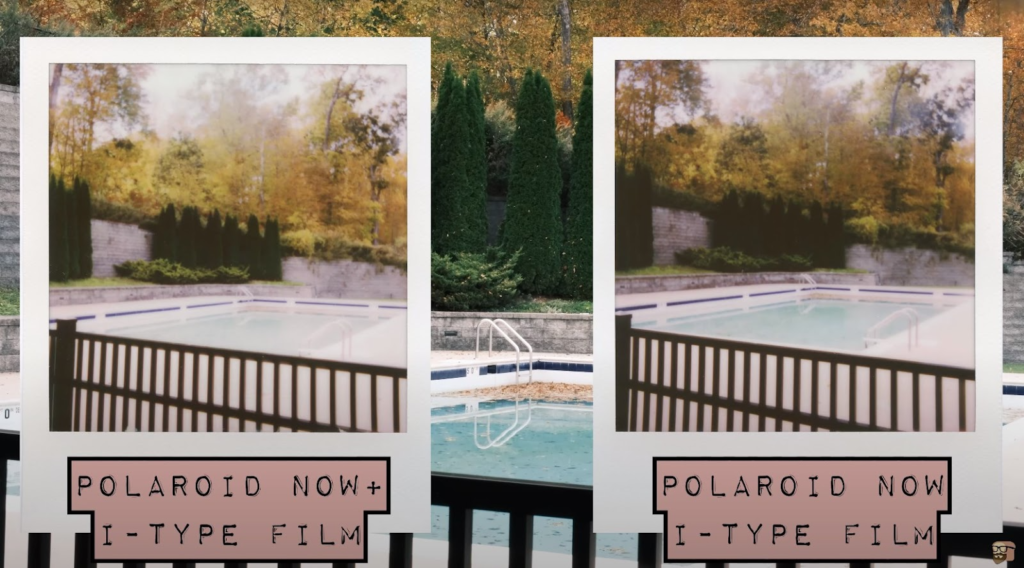
The Film Factor: Storage and Expiry Influence
- Expired Film: Using expired film can result in inconsistent picture quality, affecting brightness. Expired film might yield unpredictable outcomes, diminishing the overall appeal of your Polaroid pictures;
- Improper Film Storage: Extreme temperatures or humidity can damage the film, compromising picture quality. Optimal storage conditions involve keeping the film in a cool, dry place and utilizing it before the expiration date for optimal results.
Camera Settings: A Creative Gateway to Ideal Exposure
- Aperture: Adjusting the camera’s aperture setting determines the amount of light that enters the lens, impacting the overall brightness and depth of your Polaroid pictures;
- Shutter Speed: The duration the camera’s shutter remains open affects the exposure of the image. Faster shutter speeds are ideal for bright environments, while slower speeds can capture more light in darker settings;
- ISO Settings: The camera’s ISO sensitivity determines its ability to capture light. Higher ISO settings are suitable for low-light conditions, but they can introduce more noise to the picture. Finding the right ISO value for the lighting conditions is crucial for achieving optimal brightness.
By unraveling the interplay of these factors and experimenting with different settings and techniques, you can unlock the full potential of your Polaroid camera and produce beautifully illuminated snapshots that capture memorable moments in all their radiant glory.
How Polaroid Film Transforms Light into Timeless Memories
Polaroid film operates through a captivating interplay of various layers meticulously crafted to capture and immortalize cherished moments. Comprising a delicate blend of components, such as the light-sensitive emulsion layer, a developing layer, and a safeguarding top layer, this ingenious invention brings your snapshots to life.
Once the shutter is pressed, the light-sensitive emulsion layer within the film comes alive, ingeniously capturing the essence of the scene. It acts as a receptive canvas, eagerly awaiting the imprint of light to commence the transformative process.
The developing layer, ever ready, leaps into action, skillfully spreading and merging an intricate array of chemicals throughout the entire image. This chemical dance infuses vitality and definition, ultimately giving birth to a tangible photograph, infused with vivid colors and intricate details.

Choosing the Right Polaroid Camera Settings
Choosing the right camera settings is crucial for achieving bright and vibrant Polaroid pictures. A Polaroid camera is a unique camera that requires a different approach compared to a digital camera. There are three main settings to pay attention to when taking pictures: exposure, flash, and scene mode.
Adjusting Exposure Settings
Exposure settings determine the amount of light that enters the camera and can significantly impact the brightness of your picture. The exposure compensation setting is an essential setting that you can use to adjust the brightness of your image. It is advisable to experiment with different exposure settings to achieve the best result. In bright sunlight conditions, consider setting the compensation to “minus” to create brighter image results. On the other hand, in low-light conditions, you may need to set the compensation to “plus” to get a brighter image.
Another way to adjust exposure is by using the aperture setting. The aperture setting controls the amount of light that enters the camera by adjusting the size of the opening in the lens. A larger aperture allows more light to enter, resulting in a brighter image, while a smaller aperture allows less light to enter, resulting in a darker image. Experiment with different aperture settings to achieve the desired effect.
Using Flash Effectively
Using flash can help brighten your pictures in situations where there isn’t enough ambient light. However, it’s important to use flash appropriately; too much flash can make your pictures appear overexposed, while too little can make them too dark. Use your flash settings to determine how much flash the picture should receive and avoid overexposure.
Another tip for using flash effectively is to avoid using it when taking pictures of reflective surfaces, such as mirrors or glass. The flash can cause unwanted glare and reflection, ruining the picture. Instead, try to take pictures of reflective surfaces in natural light or use a diffuser to soften the light.
Selecting the Right Scene Mode
Your camera likely has several scene modes to choose from, including indoor, outdoor, and nighttime settings. Choosing the right scene mode based on lighting conditions can ensure you capture images that are bright, sharp, and vibrant. Check your camera settings to choose the appropriate mode.
Another factor to consider when selecting the scene mode is the subject of your picture. For example, if you’re taking a picture of a landscape, you may want to use the outdoor scene mode to capture the bright colors of nature. On the other hand, if you’re taking a portrait, you may want to use the indoor scene mode to capture the warm skin tones of your subject.
All in all, choosing the right camera settings is crucial for achieving bright and vibrant Polaroid pictures. Experiment with different settings to find the perfect combination for your pictures. Remember to adjust exposure, use flash effectively, and select the right scene mode to capture stunning images.
Taking Advantage of Natural Light
While camera settings can help brighten your pictures, utilizing natural light is also important to achieve beautiful results. Natural light can add depth, dimension, and warmth to your images. Here are some tips to help you take advantage of natural light:
Best Times of Day for Brighter Polaroids
The best time of day for bright Polaroid pictures is during the Golden Hour, which encompasses the periods just after sunrise and just before sunset. At this time, light is diffused soft, and warm, resulting in bright and beautiful images. However, this doesn’t mean that you can’t take great pictures during other times of the day. Experiment with different times of day and lighting conditions to capture unique and stunning images.
Utilizing Sunlight and Shadows
When taking pictures outside, use sunlight and its accompanying shadows to create depth and dimension in your images. Shadows can add interest and create a sense of drama in your photos. Experiment with different angles and lighting to capture the best pictures. Try taking pictures from different angles to see how the shadows change and how they can add depth to your images.
Indoor Lighting Tips
Indoor lighting can be a challenge when it comes to taking bright Polaroid pictures. However, by positioning your subject and camera properly, you can achieve bright and even lighting. If you’re using artificial light, try using a softbox or diffuser to create a softer, more natural light. Position your subject near a window to take advantage of natural light. Experiment with different angles and light sources to capture the best images possible. Remember, the key is to find the right balance of light to create the perfect shot.
By taking advantage of natural light, you can create stunning Polaroid pictures that capture the beauty of the world around you. Whether you’re taking pictures outside or inside, always be on the lookout for interesting lighting conditions and angles that can help you capture the perfect shot. With a little experimentation and practice, you’ll be able to take beautiful Polaroid pictures that you’ll be proud to display.

Editing Your Polaroid Pictures
Once you have taken your Polaroid pictures, it’s time to edit them to make them even brighter and more vibrant. The editing process can help bring out the best in your photos and make them stand out. Here are some tips to help you edit your Polaroid pictures:
Scanning Your Polaroids for Digital Editing
The first step to editing Polaroid pictures is to scan them onto your computer. This process ensures that you have a high-quality digital copy of each photo. You can use a scanner or a smartphone app to digitize your pictures. Once you have digital copies of your pictures, you can edit them using various photo editing software.
Brightness and Contrast Adjustments
One of the most important adjustments you can make to your Polaroid pictures is to adjust their brightness and contrast. This step will help make your images look even brighter and more vibrant. You can use photo editing software like Adobe Photoshop or Lightroom to adjust the brightness and contrast of your pictures. Be careful not to overdo it, as this can make your pictures look artificial and unrealistic.
Color Correction Techniques
Another important aspect of editing your Polaroid pictures is color correction. This step ensures that your pictures have an appropriate color balance after editing their brightness and contrast. You can use various color correction techniques to adjust the color temperature, saturation, and hue of your pictures. This final step will help ensure your Polaroid pictures look their best.
Bottom Line
By keeping these suggestions in your creative arsenal, you can guarantee that your Polaroid photographs exude brilliance, charm, and liveliness. Whether you’re capturing moments under the open sky or within the confines of indoor settings, understanding the optimal camera settings and finding the perfect equilibrium between technical adjustments and the allure of natural light will allow your Polaroid pictures to encapsulate the essence of each precious moment.
Don’t hesitate to explore various editing techniques and embrace the process of discovering what resonates most with your artistic vision. May your editing endeavors be filled with joy and success!