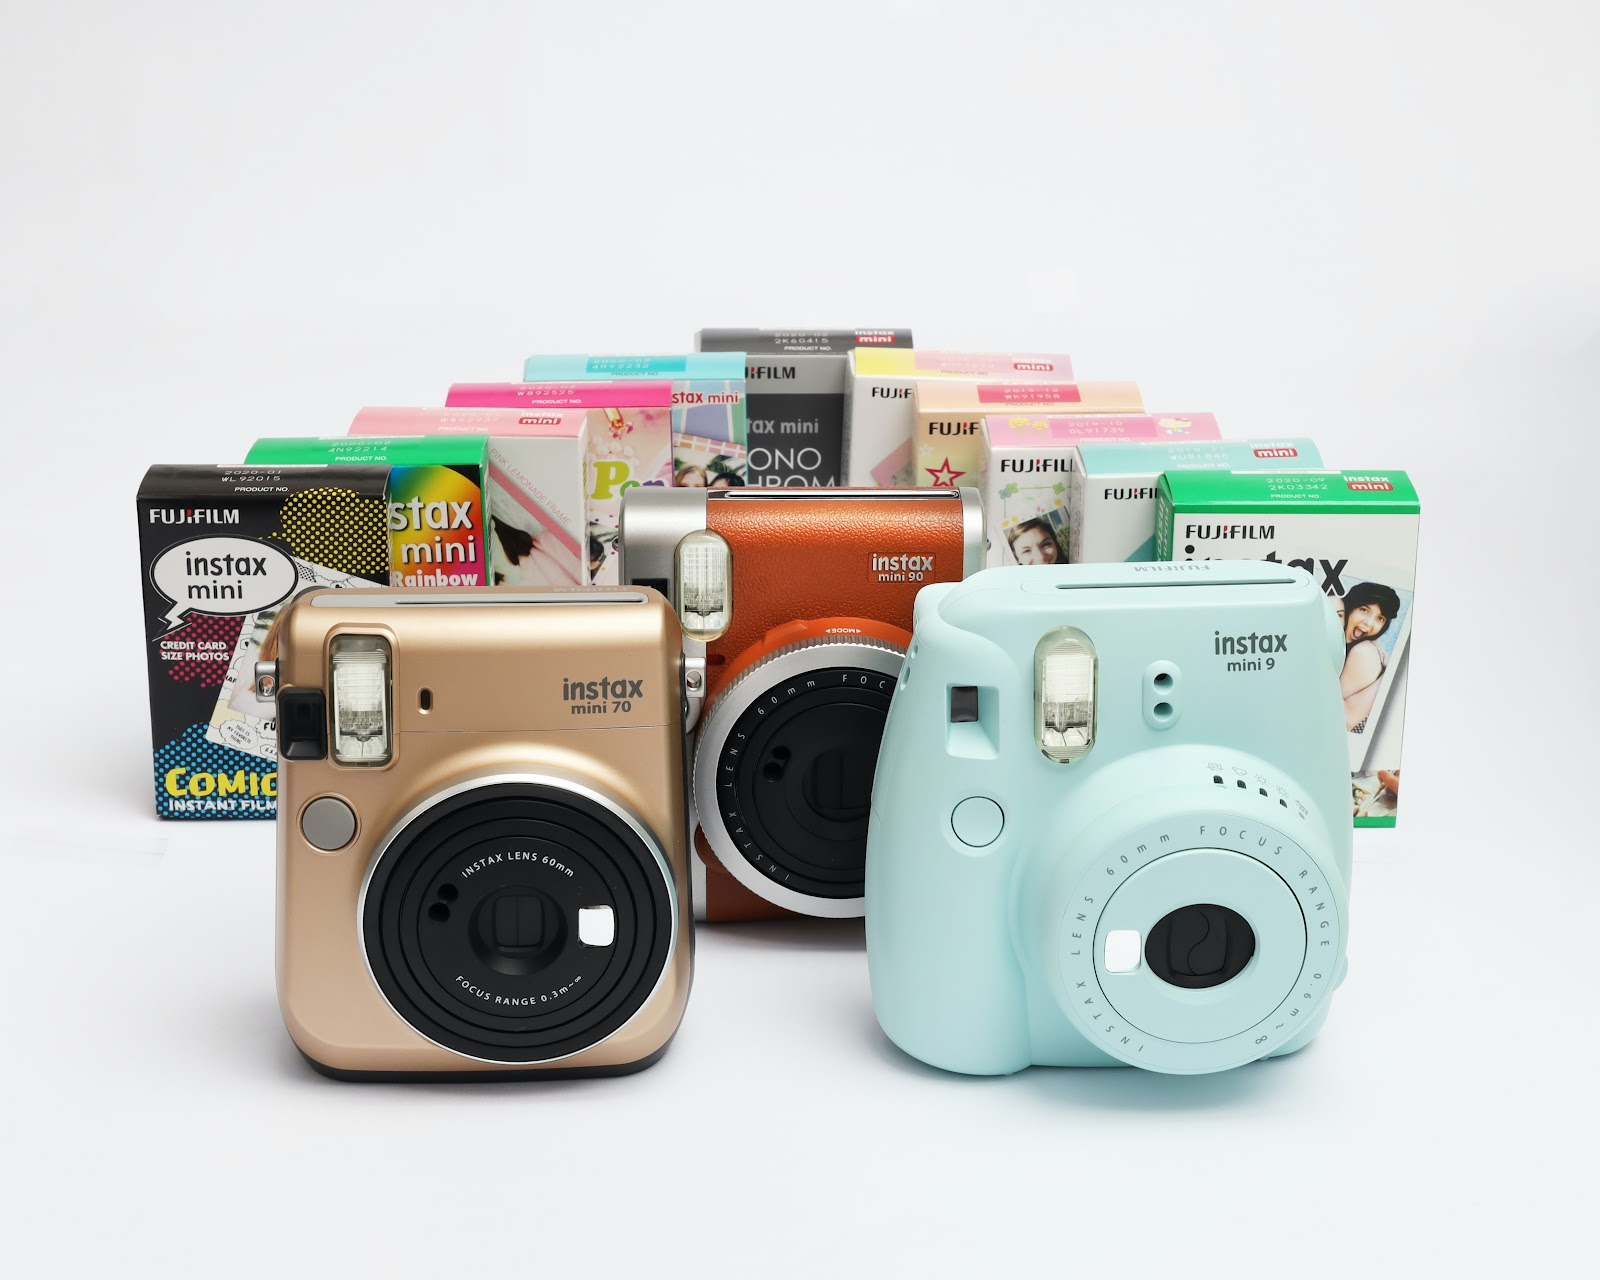
The Instax Mini 9 is a popular instant film camera made by Fujifilm. It’s simple and easy to use, making it a great option for beginners and casual photographers. The camera has automatic exposure control and several settings that allow you to customize your shooting to suit your preferences.
Instax Mini 9 Key Features
Here are the key features of the Instax Mini 9 in more detail:
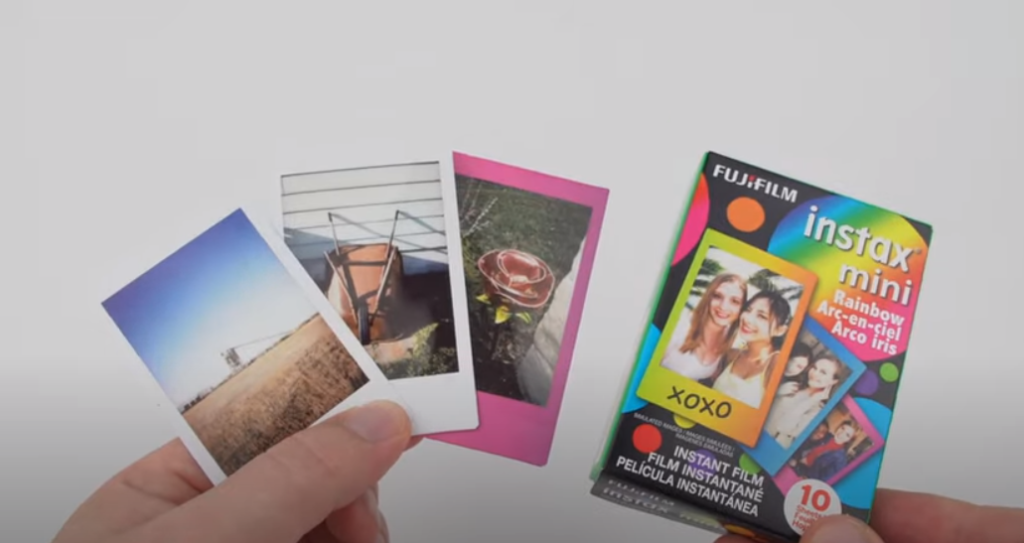
- Film format: The Instax Mini 9 uses Fujifilm Instax Mini instant film, which produces credit card-sized prints (approximately 2.4 x 1.8 inches or 62 x 46 mm). The film develops quickly and prints have a glossy surface;
- Lens: The camera is equipped with a fixed-focus lens with a focal length of 60 mm, which is roughly equivalent to a 34 mm lens in 35 mm format. The lens allows you to capture a wide range of subjects, from portraits to landscapes;
- Viewfinder: The Instax Mini 9 features an optical viewfinder located in the upper left corner of the camera body. The viewfinder helps you frame your shots and gives you a rough idea of what will be captured in the photo;
- Shutter speed: The camera has a fixed shutter speed of 1/60th of a second. This shutter speed is designed to provide optimal exposure in various lighting conditions;
- Exposure Control: The Instax Mini 9 features automatic exposure control, which means it automatically adjusts the exposure settings for each shot. The camera measures ambient light and determines the appropriate aperture for the right exposure;
- Close-up shooting: The camera comes with a close-up shooting attachment that can be mounted on the front of the camera lens. This attachment allows you to take clear and detailed close-up photos from 35 to 50 cm;
- Selfie mode: The Instax Mini 9 has a built-in selfie mode to help you take self-portraits. When shooting in selfie mode, you can set the lens to the “Selfie” position, which allows the camera to focus closer to your subject. In addition, the camera’s front mirror helps you frame your selfies accurately;
- Flash: The camera has a built-in flash that automatically fires in low-light conditions. The flash provides enough light for well-exposed photos, ensuring that your subjects are properly illuminated even in low-light conditions;
- Power source: The Instax Mini 9 is powered by two AA-size batteries. These batteries are readily available and provide ample power for camera operation.
The Instax Mini 9 comes in a variety of vibrant colors, allowing you to choose a camera that suits your style and personality.
How to use the Brightness adjustment dial?
The brightness adjustment dial on the Instax Mini 9 lets you manually adjust the exposure of your photos. Here’s how you can use it:
- Turn the camera on: Turn the camera on by flipping the power switch located on the lens barrel;
- Check the current lighting conditions: Before adjusting the brightness, you need to assess the ambient lighting conditions. Determine whether it is bright or dark to select the appropriate setting on the brightness adjustment dial;
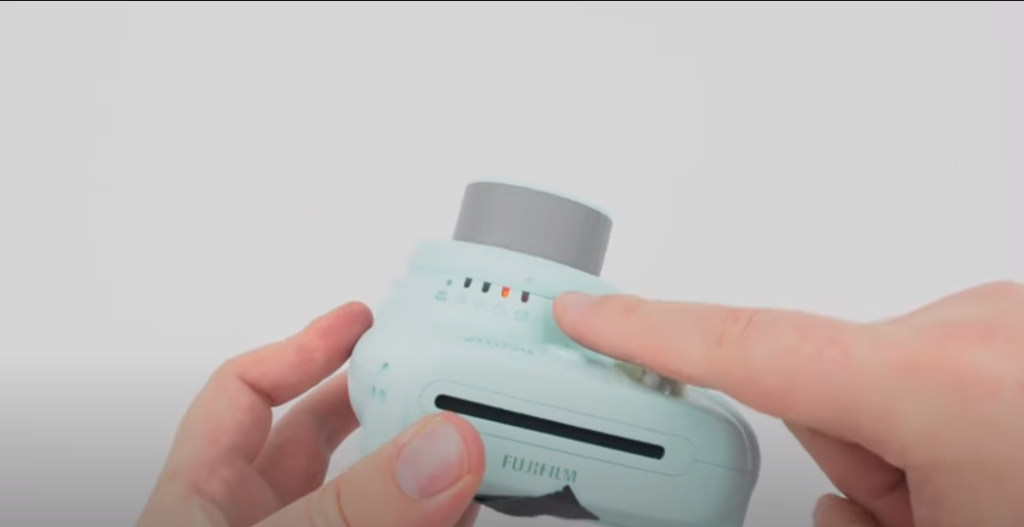
- Rotate the dial: Locate the brightness adjustment dial on the front of the camera, around the lens. Several positions will be marked on the dial;
- Select the desired setting: The brightness dial normally has four positions:Lighter (L), Normal (N), Darker (D), High key (H);
- Align Marker: Rotate the brightness dial until the marker aligns with the desired setting. The selected setting will be indicated by the marker aligning with the corresponding position on the dial;
- Take the picture: When the brightness adjustment dial is in the desired position, you are ready to take the picture. Place your subject in the viewfinder, press the shutter button, and wait for the momentary film to develop;
- Be sure to adjust the brightness according to the current lighting conditions to get well-exposed photos. You can experiment with different settings to find one that suits your preferences and the atmosphere you want to create in your photos.
The brightness adjustment dial on the Instax Mini 9 has no specific exposure values or measurements. It’s a simplified way to manually control exposure based on lighting conditions.
What is Brightness adjustment dial and Dots
The brightness adjustment dial on the Instax Mini 9 is a feature that allows you to manually control the exposure of your photos. It is a dial located on the front of the camera, around the lens, and has several positions marked on it.
The brightness dial has four basic settings:
- Lighter (L): This setting is indicated by an “L” marker on the dial. It is used for bright and sunny conditions. Selecting this setting prevents overexposure and helps you achieve well-balanced images in high light conditions;
- Normal (N): The Normal setting is indicated by an “N” marker on the dial. This is the standard setting for average lighting conditions. This setting provides a good balance of brightness and contrast for most everyday shooting scenarios;
- Darker (D): This setting is indicated by a “D” marker on the dial. It is used in low-light environments or when shooting indoors with limited lighting. When this option is selected, exposure is increased to compensate for the lack of light, ensuring that pictures are sufficiently lit;
- High-Key (H): This setting is indicated by an “H” marker on the dial. This is a special mode that creates a softer, brighter look with reduced contrast. High-Key mode is especially useful when shooting portraits or subjects where a dreamlike effect is desired.
To adjust brightness, simply rotate the dial until the marker aligns with the desired setting. The selected setting will be indicated by the marker matching the corresponding position on the dial.
The dots on the brightness adjustment dial are not functional indicators, but only decorative elements. They add visual appeal to the design of the camera without serving a specific purpose in adjusting the exposure. The actual settings are represented by the L, N, D and H markers on the dial.
Be sure to select the appropriate brightness setting according to lighting conditions to get well-exposed photos with the Instax Mini 9.
Power Switch
Located on the lens barrel, the power switch turns the camera on and off. The power switch on the Instax Mini 9 is the control that lets you turn the camera on and off. Here are some details about the power switch:
- Location: The power switch is located on the lens barrel of the Instax Mini 9 camera. It is a small, movable switch that is easy to reach with your finger or thumb;
- Power position: Slide the power switch to the “On” position to turn the camera on. Once the camera is on, you will be able to use its various features and functions;
- Off position: Slide the power switch to the “Off” position to turn off the camera. When the camera is off, it will not operate and the lens will be retracted for protection;
- Save battery power: It is recommended that you turn the camera off when not in use to conserve battery power. This will help extend battery life and ensure that the batteries are ready for use when needed;
- Indicator lights: The power switch has no built-in indicators. However, when you turn the camera on, you may notice other indicators, such as the exposure meter on the back or the flash-ready indicator, depending on the status of the camera.
It’s important to note that the Instax Mini 9 runs on batteries, so make sure you have fresh or fully charged batteries in the camera before turning it on. The camera uses two AA-size batteries, which are widely available and easy to replace.
Using the power switch effectively, you can monitor the camera’s power status, ensuring it’s ready to capture instant memories whenever you need it.
Light/Dark Mode
Light/Dark Mode on the Instax Mini 9 is a feature that allows you to manually adjust the exposure of your photos. It is controlled by the brightness adjustment dial on the front of the camera. Here are some details about Light/Dark mode:
There is a brightness dial on the front of the camera that allows you to select one of two basic settings: Lighter (L) and Darker (D). This dial allows you to manually adjust the exposure of photos based on lighting conditions.
- Purpose: The Light/Darker mode is for controlling the exposure of photographs. By adjusting this mode, you can make your photos brighter or darker depending on your preferences and lighting conditions;
- Brightness dial: Several positions are marked on the brightness dial, including Lighter (L), Normal (N), and Darker (D). These positions correspond to different exposure levels;
- Lighter (L) mode: When you set the brightness adjustment dial to “Lighter (L),” this reduces the exposure of the photo. This mode is suitable for bright and sunny conditions or when you want to avoid overexposure. It can help you avoid blurry glare and create well-balanced images in strong light conditions;
- Normal (N) mode: Normal (N) mode is the standard brightness adjustment dial setting. When you set it to Normal, a balanced exposure level is maintained, based on the camera’s automatic exposure control. This mode is suitable for average lighting conditions and provides a good balance of brightness and contrast;
- Darker mode (D): When you set the brightness control dial to “Darker (D),” this increases the exposure of the photo. This mode is useful in low-light conditions or when shooting indoors with limited light. It compensates for the lack of light by making the image brighter;
- Adjusting the dial: To switch between “Lighter,” “Normal,” and “Darker” modes, simply rotate the brightness dial until the marker aligns with the desired position. The selected mode will be indicated by the marker aligning with the appropriate position on the dial.
Remember to consider the lighting conditions and the desired effect you want to achieve when selecting the “Light/Dark” mode. Using this feature, you can better control exposure and create photos that match your creative vision.
Note that the Light/Dark mode on the Instax Mini 9 is a manual setting and does not change the camera’s automatic exposure control system. It simply allows you to override the camera’s automatic settings and adjust the exposure level.
What is High Key
High Key is a special shooting mode of the Instax Mini 9 that allows you to take bright, soft, and dreamy photos. It is indicated by the “H” marker on the brightness adjustment dial. Here are some details about High Key mode:
High Key mode is designed to create images with higher brightness, lower contrast, and a softer overall look. It gives your photos a whimsical and dreamy quality, making them light and airy.
When you activate High Key mode, the camera changes the exposure settings by intentionally slightly overexposing the photo. The result is a brighter image with softer shadows and lower contrast. The goal is to achieve a delicate and ethereal aesthetic, especially suitable for portraits, fashion shots, and other subjects where a soft and glamorous image is desired.
Activating High Key mode: To activate High Key mode on Instax Mini 9:
- Turn the brightness dial on the front of the camera to High Key (H);
- Align the marker on the dial with the “H” indicator.
When High Key mode is turned on, the camera’s exposure settings will be adjusted accordingly for a brighter, softer image.
High Key is most effective in well-lit rooms or when shooting in natural light. It works best when there is enough light to provide the right exposure and achieve the desired softness and brightness.
It can also be used creatively to enhance various subjects. It is especially popular when shooting portraits because it gives a delicate and pleasant hue to the skin of the subject. It can also be used in still life, fashion, and art photography, providing a unique and whimsical interpretation.
But be sure to switch to normal shooting mode (N) on the brightness adjustment dial when you want to return to normal exposure settings.
Selfie Mirror
On the front of the camera, there is a small mirror next to the lens to help you accurately frame your selfies. You can use this mirror to check your composition before taking a self-portrait.
The selfie mirror is designed to help you accurately frame your self-portraits. It lets you see your reflection in the mirror and make sure you are positioned correctly before taking your photo. It is located next to the lens on the front of the camera. It is a small, rectangular mirror that allows you to see yourself when you hold the camera at arm’s length for self-portraits.
To use the selfie mirror, follow these steps:
- Extend your arm and hold the camera at a comfortable distance from yourself;
- Look into the selfie mirror to align your face or desired subject in the frame;
- Adjust your position or camera angle as needed until you are satisfied with your framing.
Selfie mode: The Instax Mini 9 also has a special selfie mode that adjusts focus and exposure settings for self-portraits. When you activate selfie mode, the camera automatically adjusts settings to optimize results when taking close-up photos.
The selfie mirror on the Instax Mini 9 helps you create better self-portraits by ensuring the right position in the frame. It lets you check your composition and make any necessary adjustments before shooting.
Also, while the selfie mirror is primarily for self-portraits, it can also be useful for framing photos with other subjects. You can use it to frame your friends, family members, or subjects up close.
Exposure Counter
On the back of the Instax Mini 9 is the Exposure Counter, which shows the number of unused sheets of film and helps you keep track of the remaining frames. This is a feature that helps you keep track of how many sheets of film are left in the camera. Here is some information about the exposure meter:
- Purpose: The exposure meter is designed to visually display the number of sheets of film remaining in the camera. It helps you know how many shots can still be taken before the film can be recharged;
- Location: The exposure counter is located on the back of the Instax Mini 9, usually next to the viewfinder. It is a series of numbered indicators or a digital display that shows the amount of film remaining;
- Number of shots: The exposure meter normally shows the number of shots remaining in the film stack. For example, if there are 10 sheets in a film stack, the counter will start at 10 and decrease with each shot taken;
- Reset Meter: When you load a new stack of film into the Instax Mini 9, the exposure meter automatically resets to the full number of images available in that stack. This allows you to start shooting with a clear indication of the number of shots remaining;
- Film pack indicators: Some Instax Mini 9 cameras may have additional indicators or marks on the film pack itself that correspond to the exposure meter. These indicators allow you to visually check the number of film sheets remaining, even when the camera is off or the back cover is closed;
- Changing the filmstack: Once the exposure meter reaches zero or shows that there are no more shots, it is time to change the filmstack. Open the back cover of the camera, remove the empty film stack, and insert a new one to continue shooting.
The exposure meter is a handy feature to keep track of how many shots of the film are left so you don’t run out of film unexpectedly. It helps you plan your photo shoots and manage your film consumption efficiently.
Close-Up Lens Attachment

The camera comes with a removable close-up attachment that allows you to take close-up pictures from 35 to 50 cm. It’s perfect for taking detailed pictures of subjects such as flowers or small objects.
The close-up lens attachment for the Instax Mini 9 is an accessory that lets you take close-up photos with improved focus and detail. It is designed to take close-up pictures of subjects with greater clarity and detail.
It helps you get closer to your subject and enlarges it, allowing you to capture smaller details and create more intimate photos:
- Focus distance: Once the close-up attachment is in place, it changes the camera’s focus distance, allowing you to focus on subjects at a closer distance. The exact focus distance may vary depending on the attachment used;
- Suitable subjects: The close-up attachment is especially useful for photographing small objects, flowers, insects, or any subject that requires closer focus. It allows you to capture the intricate details and textures of these objects that may not be visible with a standard camera lens.
The close-up attachment is a valuable accessory that extends the creative potential of the Instax Mini 9, allowing you to take close-up photos with greater effect and detail.
Flash
The camera is equipped with an automatic built-in flash that fires in low-light conditions. It is designed to provide proper lighting for photos, ensuring good exposure even in low-light conditions. The flash fires whenever the camera determines it is needed.
Conclusion
The Instax Mini 9 camera has a lens adjustment dial with five different brightness settings: Very Sunny, Sunny, and Cloudy. In addition to the brightness dial, the camera has a Hi Key function for softer shots, as well as a Selfie mode and a close-up lens mount.