If you have a passion for photography or work as a professional photographer, it’s likely that you are familiar with the concept of a “fixed aperture lens.” In the world of photography, these lenses offer a range of benefits, drawbacks, and distinctive characteristics that greatly impact the quality and artistic appeal of your photos. This extensive guide aims to help you become a master in utilizing fixed aperture lenses to their fullest potential. It provides you with invaluable insights and techniques to capture breathtaking images every time you press the shutter button on your camera.
Understanding Fixed Aperture Lenses
A fixed aperture lens, also referred to as a constant aperture lens, belongs to a category of photographic lenses that retain a consistent maximum aperture throughout the entire range of zoom. The aperture, which denotes the opening in the lens permitting light to reach the camera’s sensor, remains unaltered regardless of the focal length. This implies that regardless of whether you are zoomed in or out, the aperture size remains unchanged.
Grasping the concept of fixed aperture lenses holds paramount importance for photographers aiming to optimize their potential. With a constant aperture, these lenses provide uniform exposure and depth of field across the entire zoom range. This characteristic proves particularly advantageous in various shooting scenarios, such as capturing fast-paced action during events or maintaining a desired level of background blur in portrait photography.
Nevertheless, it is essential to acknowledge that fixed aperture lenses often possess larger physical dimensions and can be more costly in comparison to variable aperture lenses. Hence, photographers must carefully evaluate their specific requirements and shooting style to determine whether a fixed aperture lens aligns with their preferences.
The Aperture in Focus
When delving into the captivating realm of photography, one encounters a fascinating element known as the aperture. This essential component is denoted by its distinct “f-numbers” or “f-stops,” such as f/1.4, f/2, f/2.8, and so forth. Each f-number embodies the aperture’s size, acting as a window that governs the ingress of light onto the camera sensor. It follows that the smaller the f-number, the wider the gateway, allowing an abundant cascade of luminosity to grace the sensor’s surface. Conversely, higher f-numbers indicate narrower apertures, restricting the influx of light into the camera’s captivating domain.
The aperture’s influence extends beyond its light-controlling capabilities. It assumes a pivotal role in shaping the visual outcome of photographs, exerting its effects on both exposure and depth of field. The exposure, which dictates the delicate interplay between brightness and darkness in an image, bows before the aperture’s authoritative presence. Simultaneously, the depth of field dances within its embrace, a mesmerizing dance that explores the vast expanses of focus. This enchanting phenomenon allows certain distances within a photograph to shimmer with clarity while gently obscuring others in a dreamy, artistic blur.
Understanding the Concept of Fixed Aperture
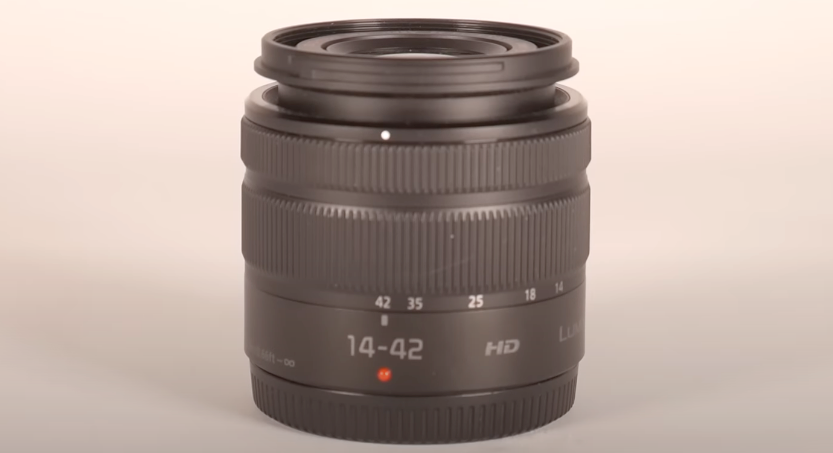
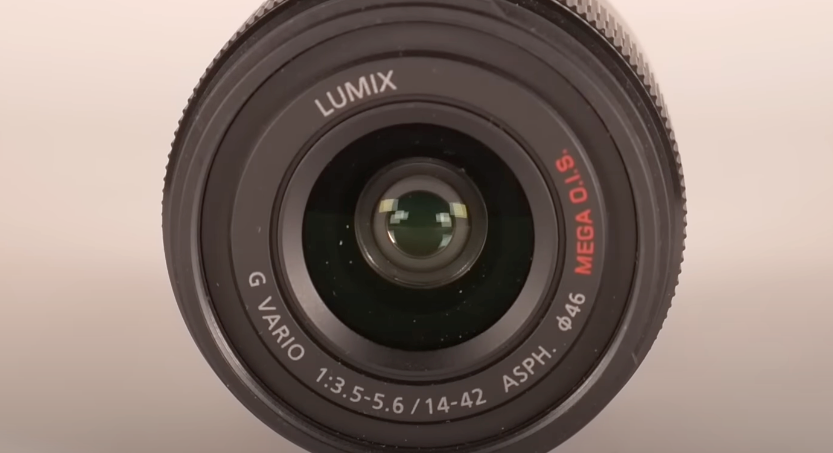
When we refer to a lens with a fixed aperture, it means that regardless of whether you are using the lens at its widest angle or zoomed in to its maximum focal length, the maximum aperture remains constant. Let’s take an example to illustrate this point: if you have a lens with a range of 24-70mm and a maximum aperture of f/2.8, you will be able to utilize the wide aperture of f/2.8 both when shooting at 24mm and when zoomed in to 70mm.
In contrast, variable aperture lenses exhibit a change in their maximum aperture as the focal length is adjusted. For instance, consider an 18-55mm lens with a variable aperture of f/3.5-5.6. This means that at the widest angle of 18mm, the lens can only open up to a maximum aperture of f/3.5. However, as you zoom in to 55mm, the maximum aperture decreases to f/5.6.
Here’s a comparison in a table format to summarize the key differences:
| Fixed Aperture Lenses | Variable Aperture Lenses | |
|---|---|---|
| Maximum Aperture | Constant throughout | Changes with focal length |
| Low-light Performance | Better performance throughout the zoom range | Reduced performance at longer focal lengths |
| Creative Control | Wide aperture available at all focal lengths | Restricted aperture at longer focal lengths |
| Price | Generally more expensive | Usually more affordable |
Fixed aperture lenses ensure a consistent maximum aperture throughout the entire focal length range, enhancing their capability to perform well in low-light conditions and granting photographers greater artistic freedom. Conversely, variable aperture lenses adapt their maximum aperture according to the focal length, making them a more cost-effective option; however, they may encounter challenges in low-light environments and limit the creative possibilities when shooting at longer focal lengths.
The Benefits and Drawbacks of Fixed Aperture Lenses
Before we delve into the tips and tricks for taking fantastic photos with fixed aperture lenses, let’s weigh up their advantages and disadvantages.
Advantages
Consistent Performance
Fixed aperture lenses provide a consistent and unwavering performance by maintaining a constant level of light intake and depth of field throughout the entire zoom range. Irrespective of whether you are zooming in or out, the aperture remains unaltered, guaranteeing a consistent exposure and background blur in all your images. This unwavering consistency enables you to anticipate and achieve uniform results, eliminating the requirement for frequent exposure adjustments. As a result, these lenses offer convenience and reliability in diverse shooting scenarios.
Superior Low-Light Performance
When it comes to performing well in low-light conditions, fixed aperture lenses truly shine. These lenses maintain a wide aperture consistently throughout the entire zoom range, ensuring ample light enters the camera sensor. With a wider maximum aperture, such as f/2.8, these lenses allow more light to reach the sensor, resulting in brighter images with minimized noise levels. This exceptional low-light performance empowers you to capture crisp and well-exposed photographs even when faced with challenging lighting scenarios, such as indoor or nighttime photography.
High Image Quality
When it comes to performing well in low-light conditions, fixed aperture lenses truly shine. These lenses maintain a wide aperture consistently throughout the entire zoom range, ensuring ample light enters the camera sensor. With a wider maximum aperture, such as f/2.8, these lenses allow more light to reach the sensor, resulting in brighter images with minimized noise levels. This exceptional low-light performance empowers you to capture crisp and well-exposed photographs even when faced with challenging lighting scenarios, such as indoor or nighttime photography.
Disadvantages
Cost
Fixed aperture lenses typically come with a higher price tag compared to variable aperture lenses. This price disparity can be attributed to their intricate design and exceptional performance. The advanced optics and engineering necessary to uphold a consistent aperture across the entire zoom range contribute to the elevated cost of fixed aperture lenses. However, the investment in a fixed aperture lens is often justified for photographers who prioritize consistent performance and outstanding image quality.
Weight and Size
Fixed aperture lenses typically exhibit larger and heavier builds in comparison to variable aperture alternatives. The inclusion of additional glass elements required to uphold a steady aperture throughout the zoom range contributes to the augmented size and weight of these lenses. While the noticeable increase in weight may be evident, particularly when carrying multiple lenses, it is crucial to consider the advantages that fixed aperture lenses bring forth.
Tips to Create Stunning Photos with Fixed Aperture Lenses
Now that we’ve covered the fundamentals, let’s move on to practical tips for using fixed aperture lenses.
Master the Exposure Triangle
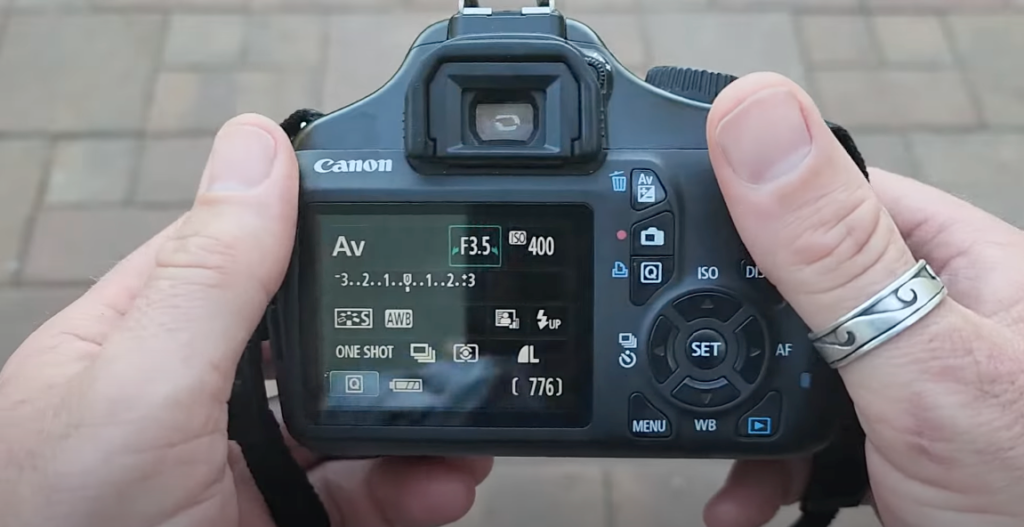
Gaining mastery over the exposure triangle is essential for photographers who strive to capture well-exposed photographs, especially when using fixed aperture lenses. The exposure triangle comprises three fundamental elements: aperture, shutter speed, and ISO. Grasping the interplay among these components is vital for attaining optimal exposure and exerting precise control over your images.
- Aperture: Aperture refers to the opening in the lens through which light enters the camera. It is measured in f-stops, where smaller values represent larger apertures. A wide aperture, denoted by a small f-stop number, enables a greater amount of light to pass through the lens. This leads to a shallow depth of field, causing the background to appear blurred. On the other hand, a narrow aperture, indicated by a larger f-stop number, restricts the amount of light entering the camera. This results in a larger depth of field, rendering the background sharper;
- Shutter Speed: Shutter speed refers to the duration for which the camera’s shutter remains open, controlling the amount of light that reaches the camera’s sensor. It is measured in fractions of a second, such as 1/1000, 1/250, or 1/30. A faster shutter speed, like 1/1000, freezes motion effectively but allows less light to enter the sensor. Conversely, a slower shutter speed, such as 1/30, permits more light to reach the sensor, but it can introduce motion blur if either the camera or the subject moves during the exposure;
- ISO: ISO refers to the camera’s sensitivity to light. It is measured using numerical values, such as ISO 100, ISO 400, or ISO 3200. A lower ISO value, like ISO 100, indicates lower sensitivity to light, necessitating more light to achieve a properly exposed image. Conversely, a higher ISO value, such as ISO 3200, enhances the camera’s sensitivity to light, enabling well-exposed photos in low-light situations. However, using higher ISO settings can introduce digital noise, which can degrade the overall quality of the image.
Tips for mastering the exposure triangle
| Title | Description |
|---|---|
| Experiment with different combinations of aperture, shutter speed, and ISO | By manipulating the aperture, shutter speed, and ISO settings in different combinations, you can observe their impact on exposure and gain an understanding of how they influence the final image. |
| Use a tripod or image stabilization techniques | When dealing with slow shutter speeds, it is crucial to utilize a tripod or employ image stabilization techniques to avoid camera shake and guarantee sharp images. |
| Consider the lighting conditions and adjust your ISO accordingly | Take the available lighting conditions into consideration and make appropriate adjustments to the ISO setting. This practice aids in achieving a well-balanced exposure while minimizing the presence of digital noise. |
| Learn to prioritize the setting that is most important for your shot | Identify the primary aspect that requires emphasis in your shot, be it the depth of field (controlled by aperture), freezing motion (controlled by shutter speed), or low-light capabilities (controlled by ISO). |
| Take advantage of your camera’s exposure metering modes | Make use of the exposure metering modes offered by your camera, such as spot metering or evaluative metering, to aid in achieving precise exposures and ensure accurate tonal representation in your images. |
| Practice regularly and review your images | Engage in consistent practice by capturing images using diverse exposure settings. Take the time to review and analyze your results, allowing you to develop a deeper comprehension of the exposure triangle and enhance your skills. |
Through a thorough understanding of how aperture, shutter speed, and ISO interact, photographers can attain precise control over exposure and achieve their intended creative effects. By manipulating these settings, a wide range of creative possibilities is unlocked. For instance, freezing the action of a fast-moving subject (using a fast shutter speed) or producing a captivating bokeh effect with a blurred background (utilizing a wide aperture). It is crucial to remember that practice and experimentation are vital in mastering the exposure triangle and refining your photography skills.
Maximize Low-Light Photography
Enhancing low-light photography is made more accessible with the utilization of a fixed aperture lens, which delivers remarkable performance in dimmer conditions. When capturing images in low light or during nighttime shoots, employing a fixed aperture lens enables you to sustain a wide aperture across your entire focal length range. This ensures a consistent influx of light to the camera sensor, eliminating concerns about aperture reduction when zooming in.
- Wide Aperture Advantage: Fixed aperture lenses typically have wider maximum apertures, such as f/2.8 or even wider. A wide aperture allows more light to enter the camera, resulting in better exposure in low-light situations. With a wider aperture, you can achieve faster shutter speeds, reducing the risk of motion blur caused by camera shake or moving subjects;
- Consistent Aperture: One significant advantage of a fixed aperture lens is that the aperture remains constant regardless of the focal length you are using. This means that as you zoom in or out, the aperture size does not change, ensuring a consistent exposure throughout the focal length range. This feature is especially beneficial when shooting in low-light conditions, as you can maintain a wide aperture and capture well-exposed images without worrying about losing light when zooming.
Tips for Maximizing Low-Light Photography
| Title | Description |
|---|---|
| Use a fixed aperture lens with a wide maximum aperture | A fixed aperture lens with a wide maximum aperture (e.g., f/2.8) performs better in low-light conditions, allowing more light to enter the camera. |
| Take advantage of the wider aperture | The wider aperture enables faster shutter speeds, reducing the risk of motion blur in low-light situations. |
| Experiment with different ISO settings | Adjusting ISO settings helps find the right balance between exposure and minimizing digital noise in low light. |
| Utilize a tripod or image stabilization techniques | Keeping the camera steady with a tripod or stabilization techniques is crucial for capturing sharp images in low light. |
| Consider using additional light sources | Using external flashes or continuous lighting can enhance overall lighting conditions for better low-light photography. |
| Shoot in RAW format for flexibility and noise reduction | Capturing images in RAW format provides greater flexibility during post-processing and better control over noise reduction. |
By maximizing the capabilities of your fixed aperture lens, you can capture stunning low-light photographs with well-exposed subjects and minimal noise. With a wide aperture and the advantage of a consistent aperture throughout the focal length range, you can confidently explore low light or night photography, pushing the boundaries of your creativity and capturing beautiful images even in challenging lighting conditions.
Experiment with Depth of Field
Experimenting with depth of field is an exciting and creative aspect of photography. By intentionally maintaining a wide aperture, you have the opportunity to manipulate the depth of field in your images, resulting in visually stunning effects.
One of the advantages of a wide aperture is the ability to create beautifully blurred backgrounds, commonly referred to as bokeh, in your portrait shots. This technique adds a sense of artistry and depth to your photographs by isolating the subject from the background. The soft and mesmerizing bokeh effect not only enhances the main subject but also adds an element of aesthetic appeal to your portrait photography, making the subject truly stand out.
In addition to portrait photography, wide apertures can also be utilized to make every detail pop in your landscape shots. By using a wide aperture, you can:
- Selectively focus on specific elements within the scene, drawing attention to them while allowing the rest of the image to softly blur;
- This technique adds a sense of depth and visual interest to your landscape photographs, making them more captivating and engaging;
- Whether you’re capturing the intricate details of a flower or highlighting a prominent foreground subject against a blurred background, the wide aperture allows you to create images that evoke a sense of depth and draw the viewer’s attention to the important elements within the frame.
Tips for Experimenting with Depth of Field
| Title | Description |
|---|---|
| Use a lens with a wide maximum aperture (e.g., f/1.8, f/2.8) | A wide maximum aperture allows more light to enter the lens, resulting in a shallower depth of field and increased bokeh effect. |
| Consider the distance between subject and background | Adjusting the distance between the subject and the background helps control the level of background blur and the overall depth of field. |
| Experiment with different focal lengths and subject distances | Varying the focal length and subject distance enables you to achieve different depth-of-field effects and creative compositions. |
| Pay attention to composition and ensure sharp focus on the subject | Composition is crucial in depth of field photography, and ensuring the main subject is in sharp focus creates visually appealing images. |
| Consider desired mood and visual impact | Determine the desired mood and visual impact of your photograph when choosing the appropriate depth of field to enhance the storytelling. |
By embracing depth-of-field experimentation and utilizing wide apertures, you can add an extra dimension to your photography. Whether it’s creating stunning bokeh in portraits or emphasizing details in landscapes, understanding and mastering depth of field allows you to create impactful and visually captivating images. Practice, explore different settings, and let your creativity shine through as you experiment with depth of field to bring your artistic vision to life.
Consider Your Composition
When capturing photographs, it’s important to remember that composition plays a crucial role in creating visually appealing and engaging shots. Even though zoom lenses offer flexibility in adjusting the focal length, the composition remains an essential element. Consider incorporating the following compositional techniques to enhance your photography:
| Composition Techniques | Description |
|---|---|
| Rule of Thirds | Divide your frame into a grid of nine equal parts by overlaying two horizontal and two vertical lines. Place your subject or points of interest along these lines or at their intersections. This technique adds balance and visual interest to your composition. |
| Leading Lines | Utilize natural or man-made lines, such as roads, pathways, or architectural elements, to guide the viewer’s eye through the image. Leading lines create a sense of depth, drawing attention to the main subject or focal point. |
| Framing | Utilize elements within the scene, such as windows, doorways, or foliage, to frame your subject. This technique adds depth and directs the viewer’s focus to the main subject while creating a sense of context and visual interest. |
By incorporating these compositional techniques into your photography, you can create visually appealing and compelling images that capture the viewer’s attention. Experiment with different perspectives, angles, and compositions to find the most effective way to tell your story and convey your intended message through your photographs.
Take Care of Your Lens
Taking care of your camera lens is essential for maintaining optimal image quality and ensuring the longevity of your equipment. By following a few simple steps, you can protect your lens from dust, moisture, and scratches, preserving its performance for years to come. Here are some important tips for lens care:
| Lens Care Tips | Description |
|---|---|
| Protect from Dust, Moisture, and Scratches | Avoid exposing your lens to dusty or sandy environments as particles can settle on the lens surface and affect image quality. Use a lens hood or protective cover to shield the lens from moisture during wet conditions. Use lens caps when the lens is not in use and avoid contact with abrasive materials to prevent scratches. |
| Use a Proper Lens Cleaning Kit | Invest in a high-quality lens cleaning kit that includes a microfiber cloth, lens cleaning solution, and a blower brush. Use the blower brush to gently remove loose debris or dust particles. Clean the lens using a circular motion with the lens cleaning solution and a microfiber cloth, starting from the center and working outward. |
| Consider a Protective Filter | Consider using a protective filter, such as a UV or clear filter, on your lens. This additional layer of glass provides physical protection against scratches, dust, and accidental impacts. It is easier and more affordable to replace a filter than to repair or replace the lens itself in case of damage. |
By taking care of your lens through proper cleaning and protection, you can ensure optimal image quality and extend the lifespan of your lens. Remember to handle your lens with care, avoid harsh conditions, and regularly clean and inspect it for any signs of damage. Your lens is a valuable piece of equipment, and by maintaining it properly, you can continue to capture exceptional photographs for years to come.
Conclusion
Mastering photography with fixed aperture lenses requires understanding their challenges and benefits. These lenses offer a fixed aperture throughout their focal length range, limiting adjustment options. However, they excel in various shooting scenarios, such as low-light conditions, fast-paced events, and portrait shots. To utilize their potential, practice, patience, and creativity are essential.
While fixed aperture lenses present initial challenges, they offer significant benefits. They perform consistently across focal lengths and excel in different shooting situations. To master these lenses, practice extensively, be patient, and embrace creativity. With time and dedication, you can elevate your photography skills and capture captivating images.
Frequently Asked Questions
There is no absolute answer to this as it depends on your needs as a photographer. Fixed aperture lenses offer consistency, better low-light performance, and often superior image quality. However, they are also more expensive and heavier.
A good fixed aperture rating typically falls within the range of f/2.8 and f/4, striking a balance between light intake and lens size. These aperture ratings are popular among photographers seeking optimal performance.
However, professional lenses often offer even wider apertures, such as f/1.4 or f/1.8, which allow for greater light gathering capabilities and creative depth-of-field effects.
While not a necessity, fixed aperture lenses can be advantageous for portrait photography due to their ability to create a shallow depth of field, blurring the background and making the subject stand out.